Interlocking Deck Tiles
The concrete slab of an apartment balcony is frequently stained by decades of pollution, lime efflorescence, and rainwater runoff. Walking barefoot on cold, rough concrete robs the balcony of comfort. Traditional decking requires treated timber joists, heavy power saws, and masonry anchors into the building facade—modifications strictly forbidden in standard lease contracts. Modular interlocking deck tiles solve this entire architectural conundrum.
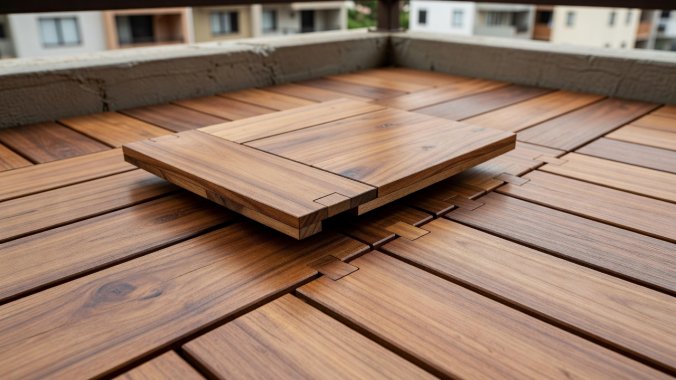
The Anatomy of an Interlocking Tile
Each tile—standardized at 30 cm by 30 cm (approx. 12 inches square)—consists of two fused components:
- The Upper Slat Array: Slats of seasoned hardwood (such as Acacia, Teak, or Ipe) or Wood-Plastic Composite (WPC) engineered with anti-slip micro-grooves.
- The Polymer Grid Base: An injection-molded polypropylene base plate fitted with male-to-female snap latches along all four perimeters. This grid elevates the timber 12mm to 15mm off the concrete surface.
Crucial Drainage Dynamics
The elevated grid base is the most vital engineering feature of interlocking tiles. Balcony concrete is poured with a deliberate 1–2% slope towards exterior scupper holes. By lifting the wood above the concrete, the grid allows rain and spills to flow unobstructed beneath the floor without pooling around the slats. This continuous air gap prevents rot, mold growth, and standing water insect breeding.
| Factor | Acacia Hardwood Tiles | Wood-Plastic Composite (WPC) |
|---|---|---|
| Tactile Sensation | Warm, authentic organic wood grain | Even, uniform engineered texture |
| Yearly Maintenance | Requires application of teak oil once per year | Zero maintenance; simple hose rinse |
| UV Resistance | Patches develop silver patina if untreated | High color stability with UV inhibitors |
| Trimming Customization | Effortlessly cut around drain pipes with hand saw | Requires fine-tooth carbide circular blade |
Step-by-Step Installation Protocol
Step 1: Thorough Cleansing. Sweep all loose gravel, moss, and dirt from the concrete substrate. Scrub stubborn algae with a vinegar-water mix and allow the surface to dry completely.
Step 2: Determine Layout Geometry. Decide between a parallel slat orientation (modern linear look) or an alternating checkerboard pattern (adds visual texture and masks structural asymmetry in older buildings).
Step 3: Align from the Outermost Corner. Start snapping tiles together from the most visible outside corner, working your way inward toward the balcony threshold door. Press firmly with your heel or a rubber mallet until you hear the mechanical snap.
Step 4: Perimeter Expansion Gaps. Leave a 10mm expansion gap between the tile edges and perimeter walls to accommodate seasonal thermal expansion.